
We’ve all seen those message bars at the top or bottom of a website. They usually inform us of the use of cookies, alert us to a sale, or ask us to sign up for the newsletter. There are lots of plugins available to add these bars to your website. What if you could create them with the Divi Builder? You can with a third-party plugin called Divi Bars.
Divi Bars creates those message bars by allowing you to use Divi layouts. You can include any type of content you want, make them large or small, place them at the top or bottom, have them to scroll or stay in place, and even have them to appear based on a trigger.
Divi Bars works with Divi and Extra and is available from the publisher’s website. I’m using version 1.0.
Installing and Activating Divi Bars
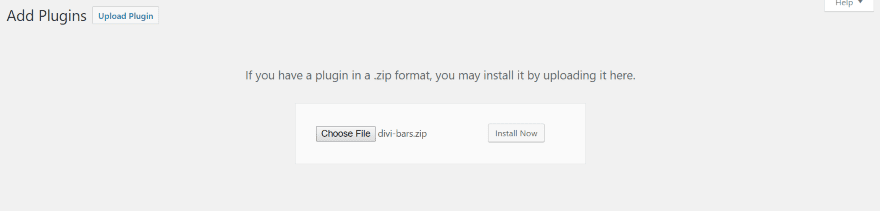
Upload and activate the plugin as normal.
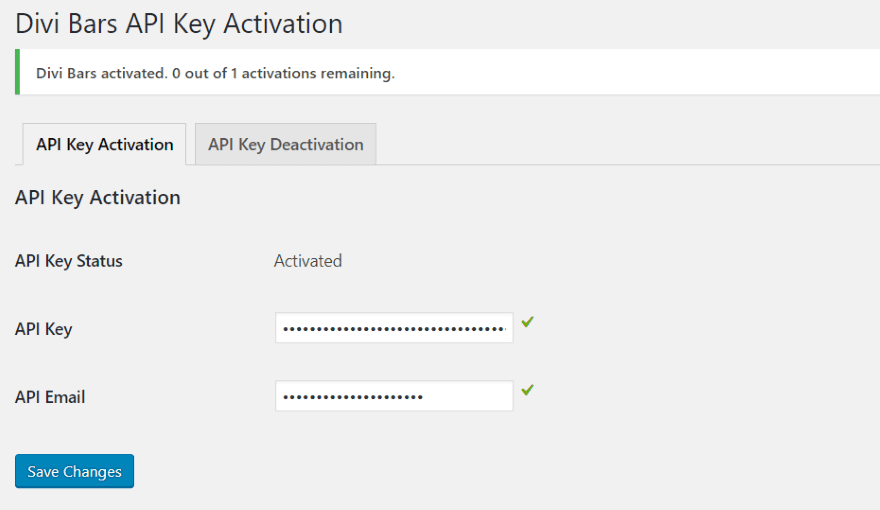
After activating the plugin you’ll see a message that you need to enter the API Key. Click the link or in the dashboard menu go to Settings, Divi Bars Activation.
Enter your API key and email, and save changes. You’ll see a message at the top that shows how many activations you have left (this will vary depending on the license you purchase).
Divi Bars Settings
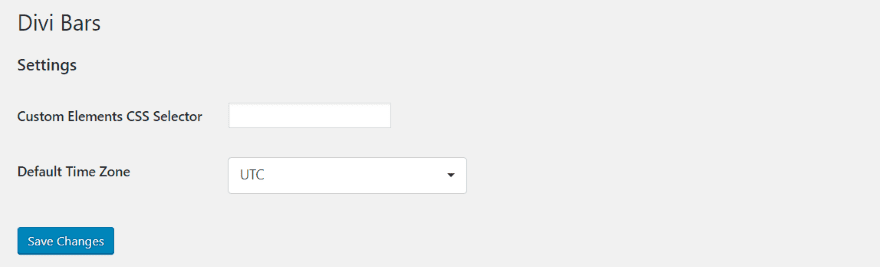
In the dashboard menu, go to Divi Bars, Settings. Here you can input a custom CSS selector and choose the default time zone.
Enable Output Styles Inline
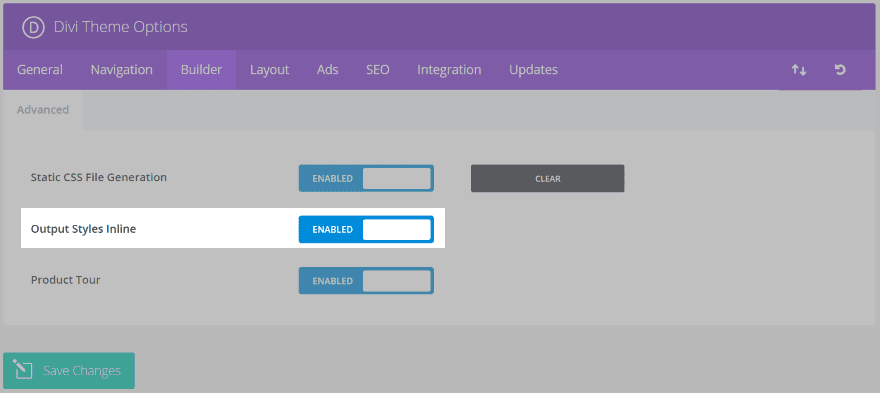
You’ll need to enable the inline output styles. In the dashboard menu go to Divi, Theme Options, and select the Builder tab. Enable the middle option (Output Styles Inline). Be sure to click Save Changes.
Creating a Divi Bar

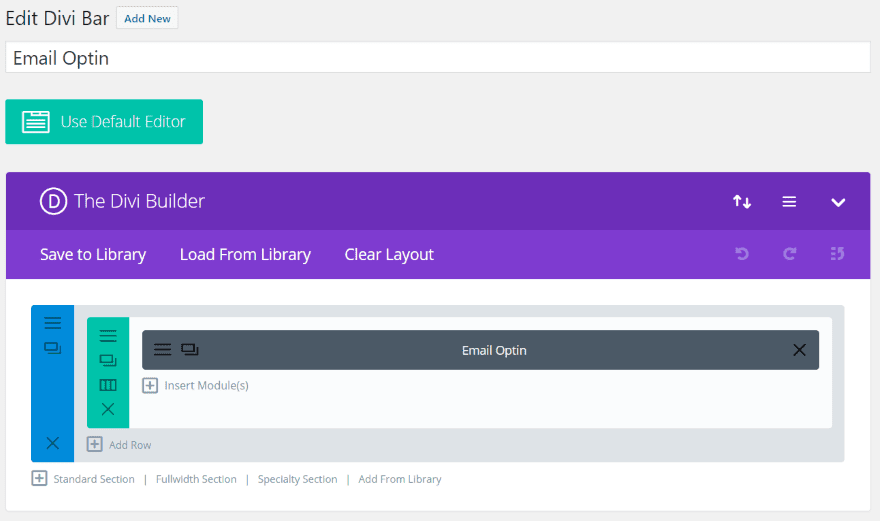
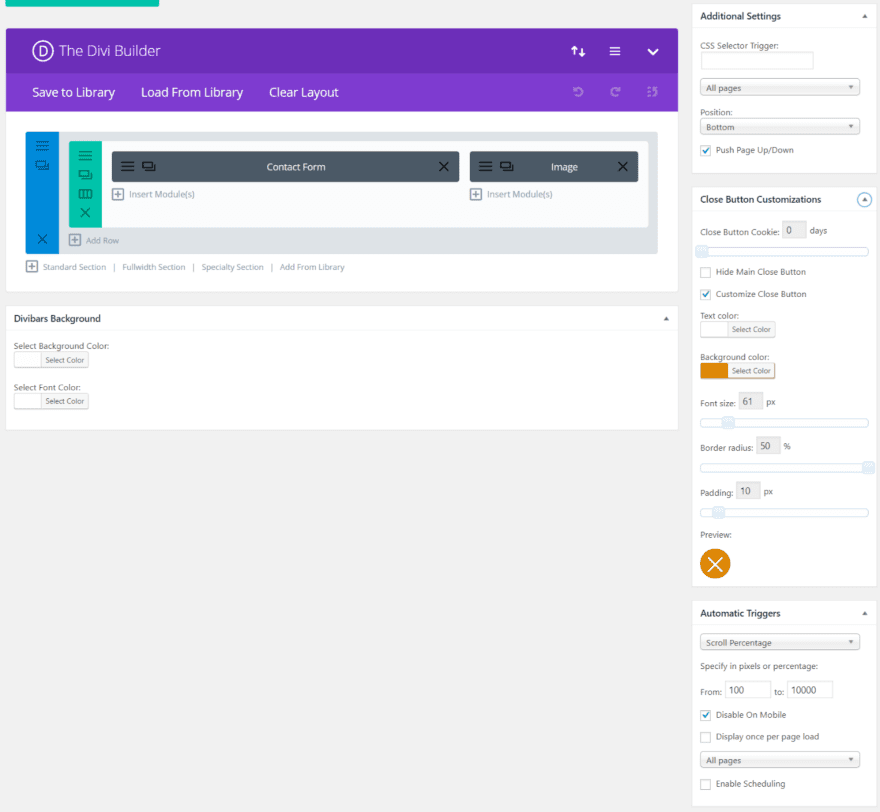
In the dashboard menu, go to Divi Bars, Add New. You’ll see a screen like the one above where you can create a Divi Bar. Select the Divi Builder just like creating a page or post. It also has fields where you can select background colors, add triggers, set pages and positions, customize the close button, and set automatic triggers.
Note – In order to get the bar to display it has to have a trigger. If you leave it set to None it will not display. More on this later.
Divi Bars Uses the Divi Builder
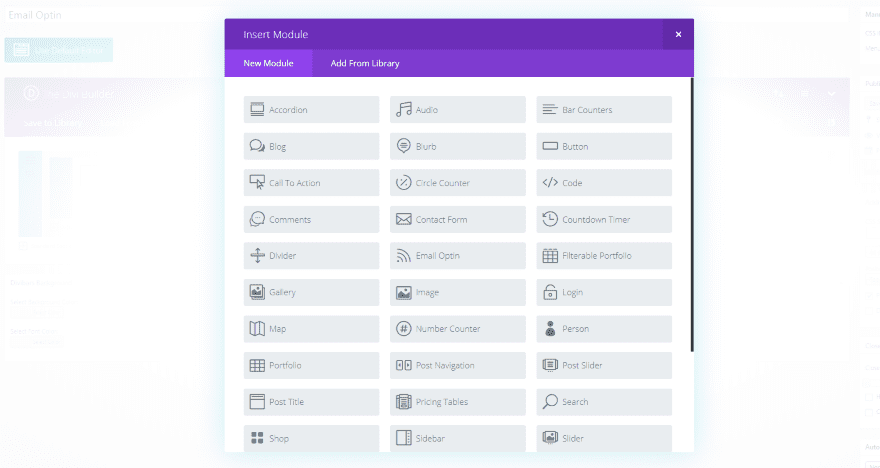
Create layouts as normal. This means you can add any module from the Divi Builder including contact forms, video, shop, images, email optin, map, portfolio, etc. Padding and margins are already removed from the sections and rows so the bar doesn’t take up a lot of space. All of the Divi animation features work as well.
It doesn’t use layouts from the standard Divi Library but you can save your layouts to the Library and reuse them. Only those made for Divi Bars will be available in the Load From Library tab.
Divi Bars Background
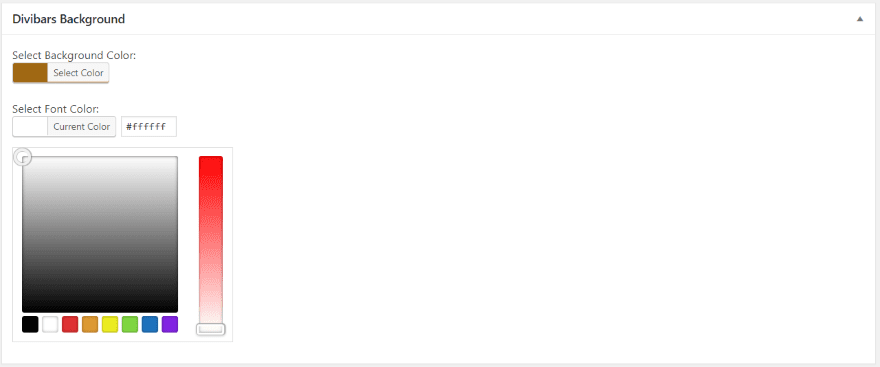
The Divi Bars Background area lets you choose the color of the background and the font. This only does solid colors with an opacity setting. I recommend using the Divi Builder Sections’ background features, but this is here if you want it.
Additional Settings
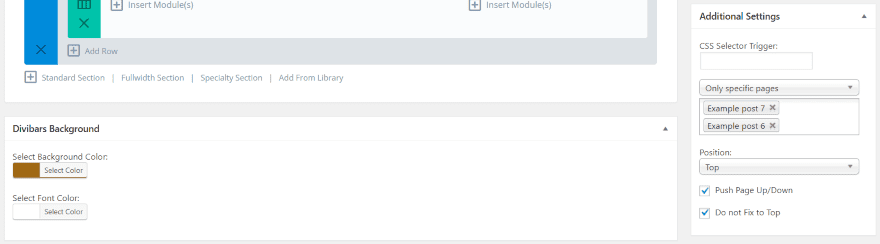
In Additional Settings you can create your own CSS selector trigger. Dropdown boxes allow you to show the Divi Bars on one page or specific pages, and to choose the position. You can also choose to push the page up or down, and choose if the Divi Bars is fixed.
Close Button Customizations
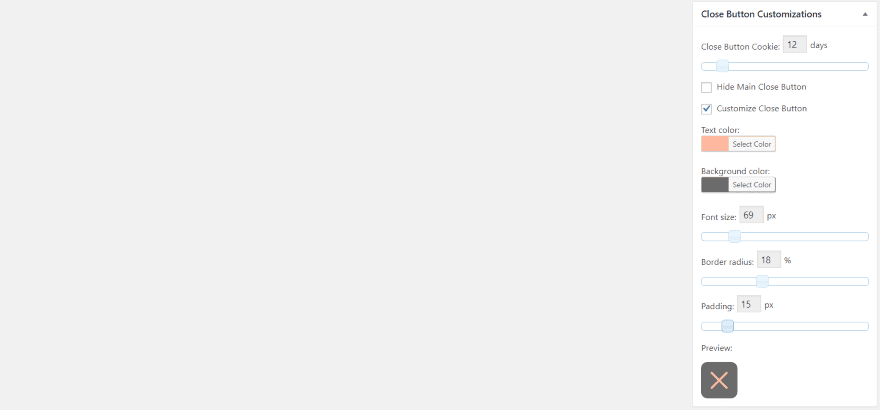
In Close Button Customizations you can set the number of days the cookie will last, show or hide the close button, and customize the button. Customizations include the text color, background color, font size, border radius, and padding. It provides a preview as you make changes so you can see it in real time.
Automatic Triggers
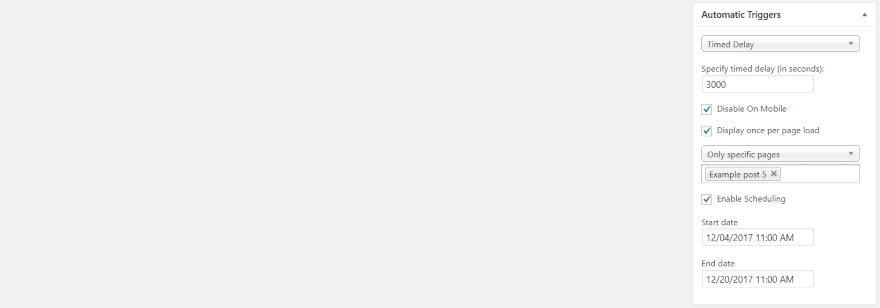
Automatic Triggers lets you choose how it will display. Each trigger has its own settings. If you leave it set to None it will never display.
- Choose Timed Delay and then specify the amount of time to wait before Divi Bars is displayed. To get it to always display choose Time Delay and set the delay to 0.
- Choose Scroll Percentage and specify the number of pixels or the percentage of scroll before displaying the bar. This means you can display the bar as the user gets to a specific point on the screen.
- Choose Exit Intent to display the bar when the user’s mouse moves to the address bar.
You can also disable on mobile, display only once on a page load, specify the pages it displays on, and schedule when the bar displays. You can set the starting and ending date and time.
Divi Bars Templates
The advantage of using the Divi Builder is how easy it is to create and share templates. Currently Divi Bars has 3 templates. Here’s a look at each. First, here’s how you import them…
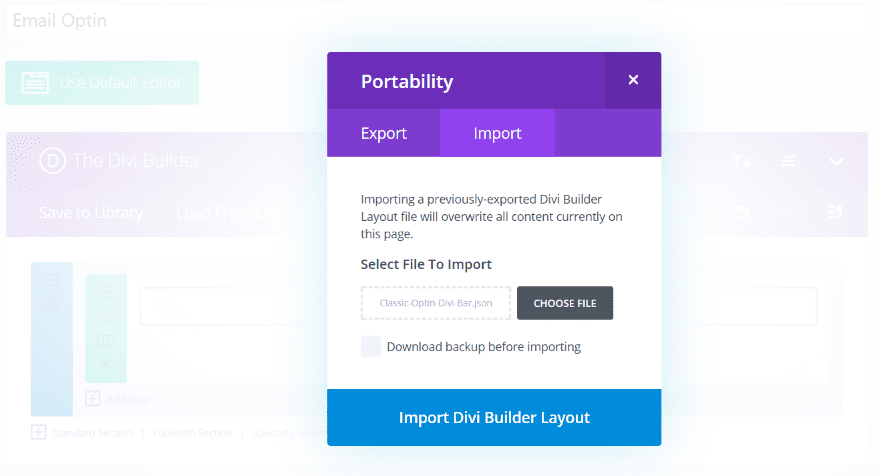
Import the templates into the Divi Builder using the Portability Tool (the up and down arrows in the right corner of the Divi Builder). Choose Import, navigate to your file, and click Import Divi Builder Layout.
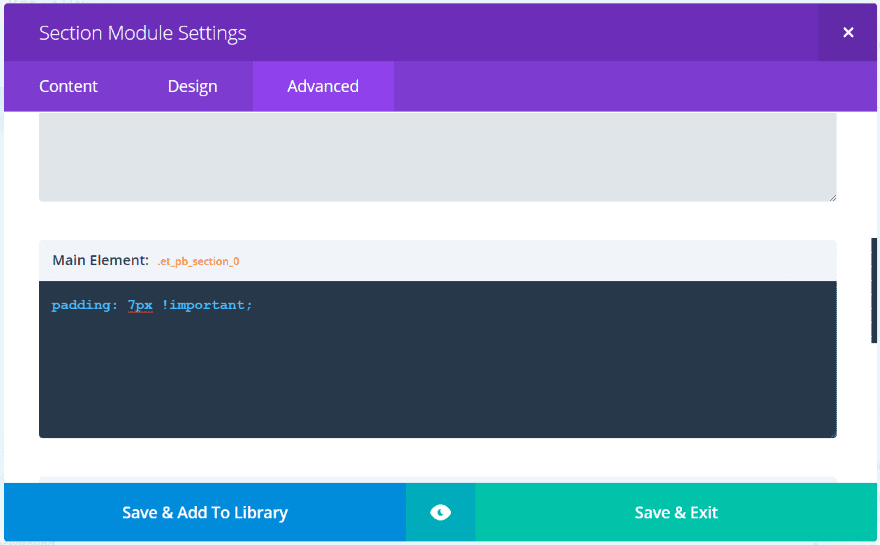
If you have issues with extra padding in your layouts, you’ll need to add the padding to the section’s Custom CSS in your Divi Bars layout. Go to the Section for your Divi Bars layout and open the Advanced tab. Place your custom CSS in the Main Element field.
Divi Bars Email Optin
This template includes a single email optin module. I’ve added padding in the Advanced tab.
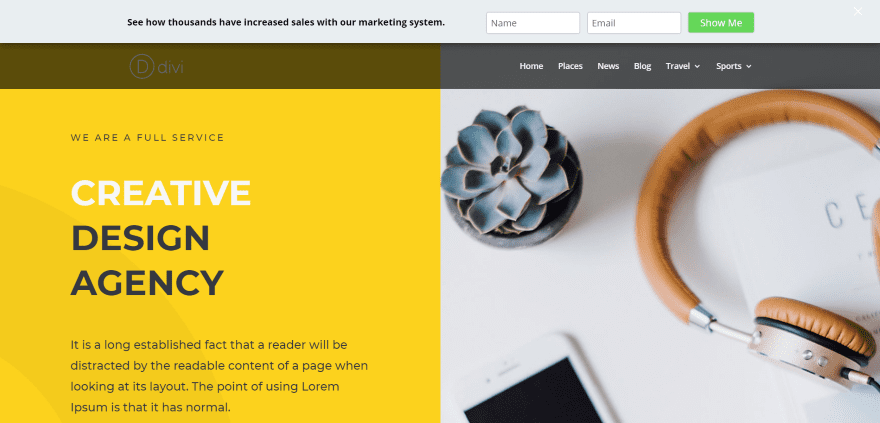
I’ve set it to push the content down to display the email optin above the menu. It remains on screen as the user scrolls. This uses the Design Agency layout pack.
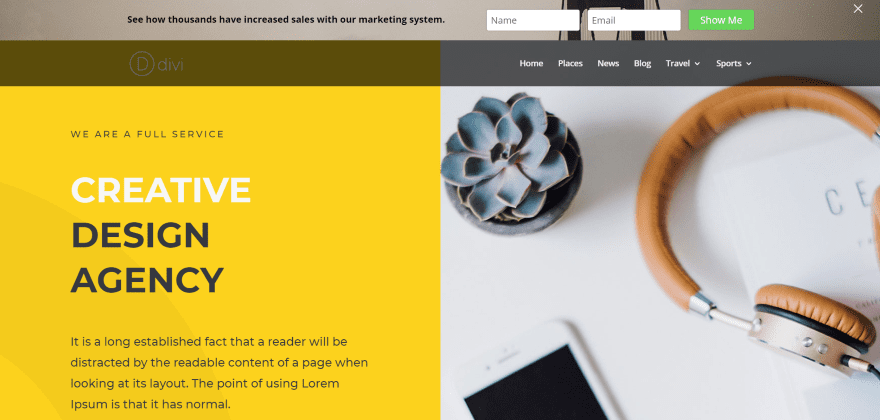
This is the same example, but now I’ve added a background image.
Divi Bars Countdown and Coupon
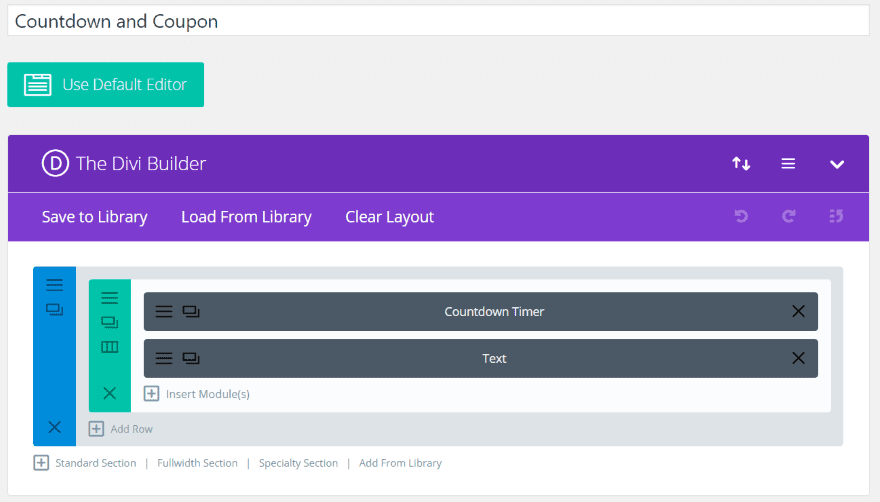
Countdown and Coupon uses a countdown timer and text module. It includes custom CSS.
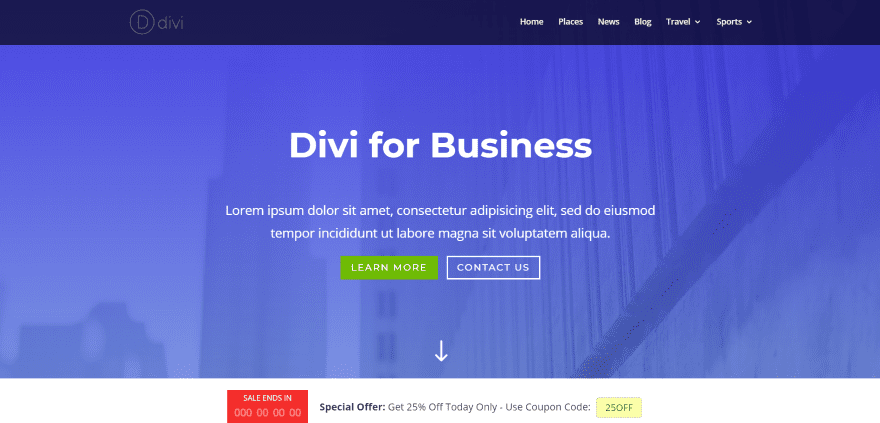
I’ve set this one to display at the bottom of the page. This example uses the Business layout pack.
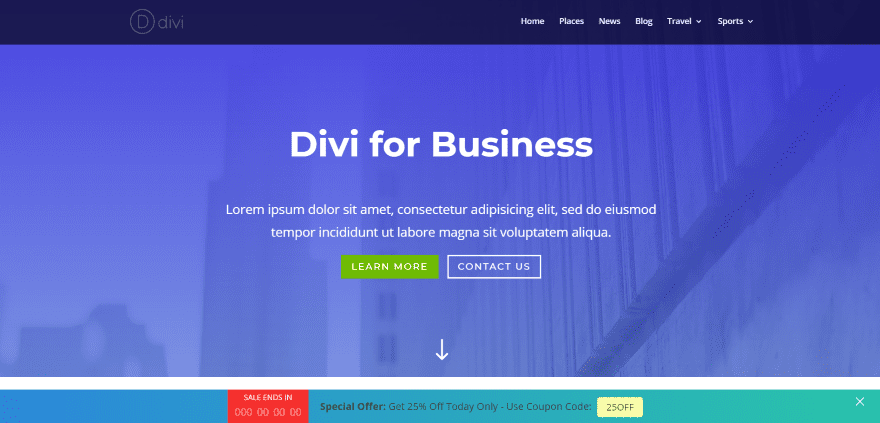
Here’s how it looks with Divi’s default gradient turned 90 degrees. The white bar above the Divi Bars is from the layout.
Divi Bars Divi 3
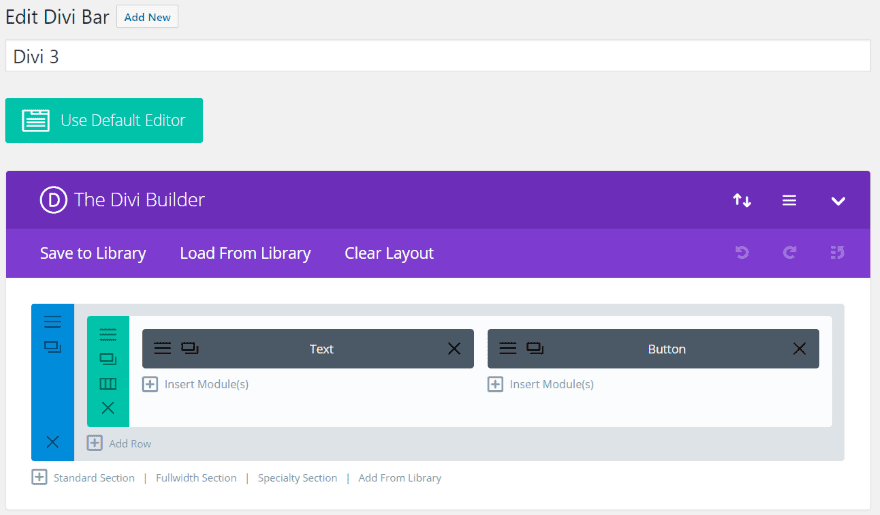
Divi 3 displays a text module and button. I’ve added the padding in the Advanced tab. It also comes with custom CSS.
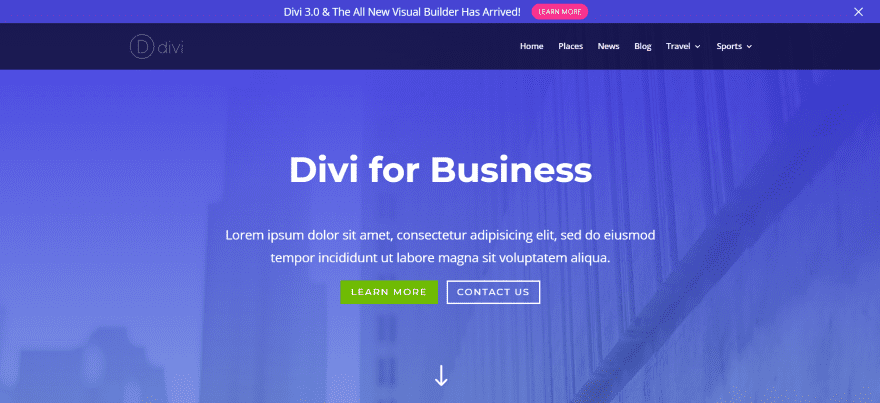
Here’s Divi 3 with its blue background and red button.
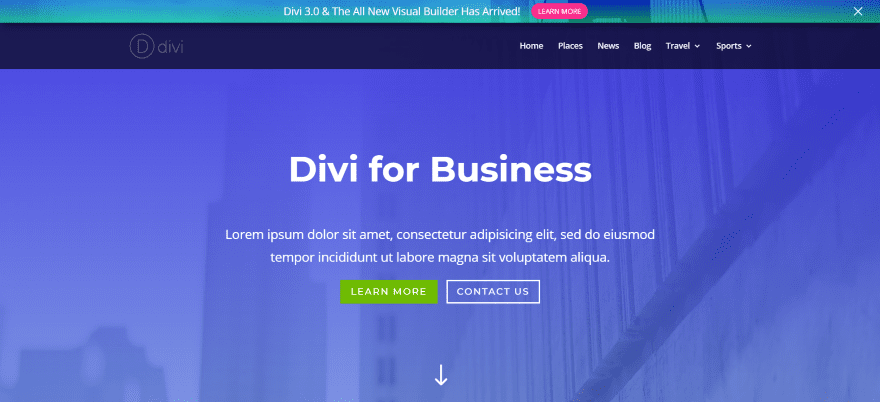
Here I’ve added the background image from the header and placed a gradient overlay.
My Divi Bars Example
I’ve added a Contact Form module with an image. I’ve selected to show it from the bottom as the user reaches a specific range of pixels on the screen. I’ve also styled the close button.
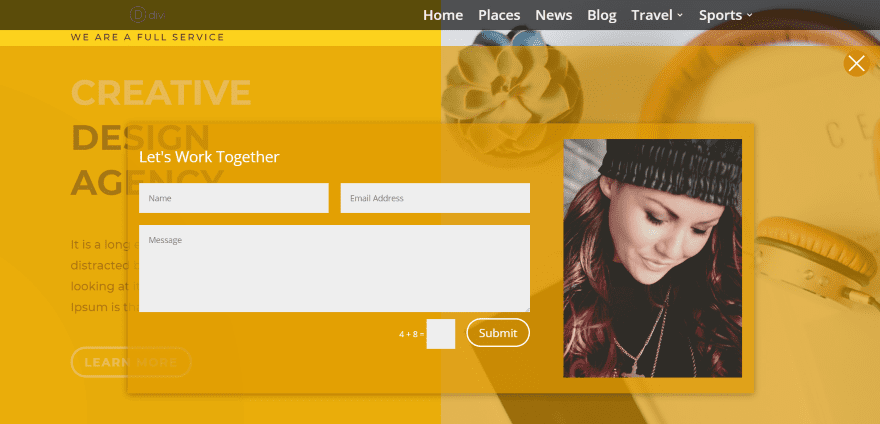
Here’ the contact form within the Design Agency layout pack. I’ve added an overlay and decreased the opacity to allow some of the background to show through. I’ve styled the form’s button to match.
Using Multiple Divi Bars
You can use more than one Bar at a time. There are several ways to do this. For example, you can set one for the top and another for the bottom. They could appear at different times, under different circumstances, or at the same time.
Another option is to use the pixel or percentage features. You could show one Bar within the first portion of the screen and another Bar for a different portion of the screen. I don’t recommend having too many at once. If you do use multiple Bars then I recommend keeping them small.
This example uses Divi 3 on the top and Countdown and Coupon on the bottom.
Divi Bars Menu
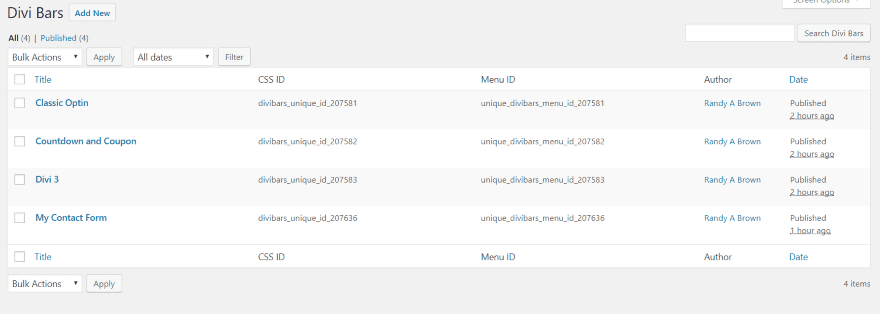
Within the Divi Bars menu is a screen where you can see all of your Divi Bars. Here you can add new, edit, quick edit, and delete your bars. You can also copy the CSS and Menu ID’s to create your own manual triggers.
Using Divi Bars with Extra
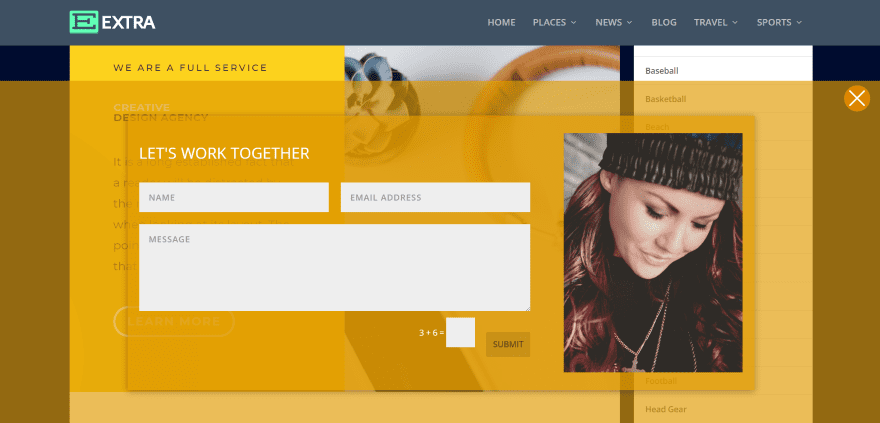
Divi Bars works the same with Extra as it does with Divi. Here’s a look at my contact form in Extra with the Design Agency layout pack.
License and Documentation
There are four licenses available:
- Single Site – $15
- 3 Sites – $29
- Unlimited Sites – $59
- Lifetime – $129
Documentation is provided at the developer’s website. It includes 6 steps for getting started quickly and a 16 minute video that’s more in-depth. Divi Bars is easy to use but I do recommend watching the video.
You can purchase Divi Bars from the developer’s website.
Ending Thoughts
I like Divi Bars. Everything is intuitive except for getting it to display the first time. Every bar is automatically set to not display until you choose a trigger. This makes sense because you don’t want multiple bars displaying just because you’ve created them. At first I wanted a message somewhere that drew attention to that fact or a yes/no display option. Once you’ve gone through the steps once it makes sense.
Divi Bars is an excellent tool for adding message bars such as cookie disclaimers, information about sales, messages, calls to action, etc. It comes with several templates to get you started. It works just as well for the user experience as it does with marketing. Since it uses the Divi Builder the possibilities are endless.
We want to hear from you. Have you tried Divi Bars? Let us know what you think about it in the comments.
Featured Image via venimo / shutterstock.com