[ad_1]
Author pages used to be difficult to customize. With the Divi Theme Builder, that’s no longer an issue. You can personalize not only author pages but also category pages, search results pages and more. In this post, we’ll show you how to create a dynamic author page template with Divi’s Theme Builder.
When you recreate this layout inside the Divi Theme Builder, you’ll be using dynamic content so all author pages will be affected at once while keeping content unique to the author in place. All you’ll need to do is make sure all authors have updated information. If they don’t have good Gravatar images, we suggest you download the WP User Avatar Plugin to have more control. You’ll be able to download the template’s JSON file for free as well!
Let’s get to it.
Preview
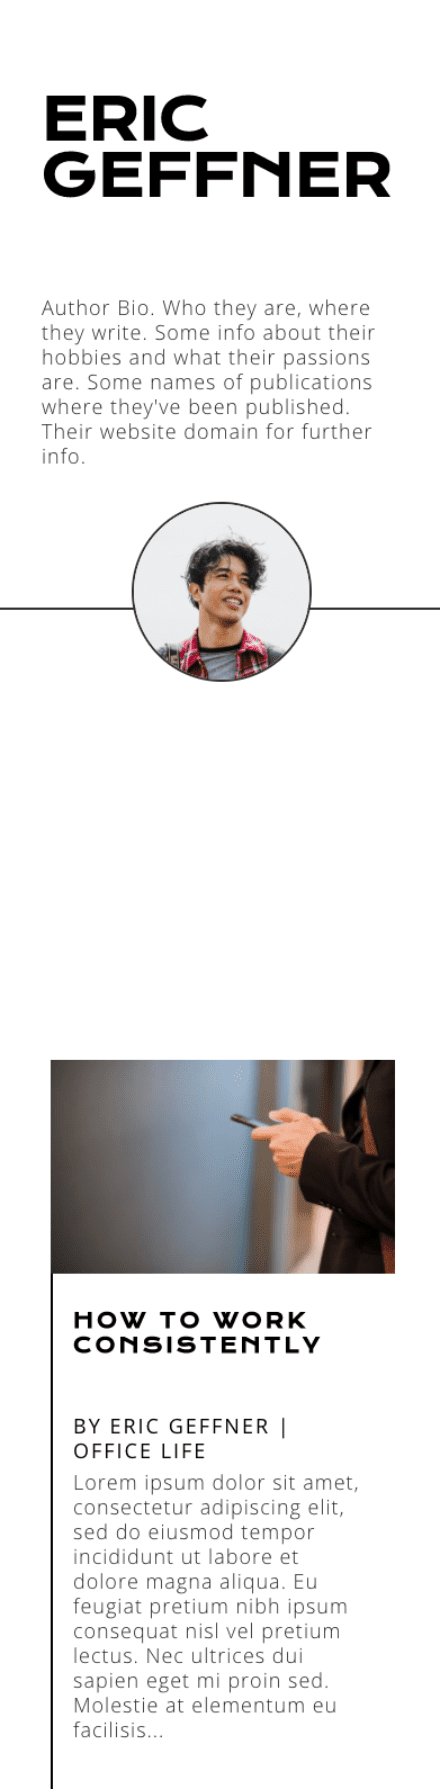
Before we start recreating the author page template inside the Theme Builder, let’s take a look at the outcome across different screen sizes. While building the template, the design will look slightly different inside the template editor. We suggest you have two windows open, one with the template editor and one with a live preview.
Desktop

Mobile
Download The Welcoming Author Page for FREE
To lay your hands on the free author page template, you will first need to download it using the button below. To gain access to the download you will need to subscribe to our Divi Daily email list by using the form below. As a new subscriber, you will receive even more Divi goodness and a free Divi Layout pack every Monday! If you’re already on the list, simply enter your email address below and click download. You will not be “resubscribed” or receive extra emails.
You have successfully subscribed. Please check your email address to confirm your subscription and get access to free weekly Divi layout packs!
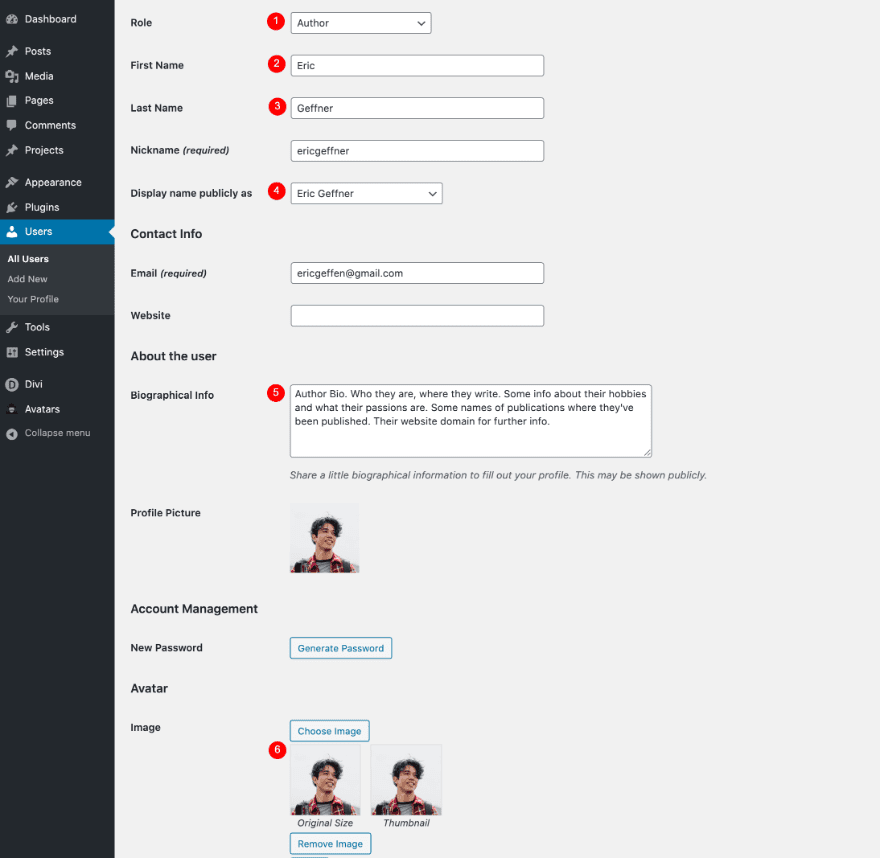
1. Update User
Optimize Author Images
Add WP User Avatar Plugin
When an author is added to your WordPress, the system automatically pulls a Gravatar image. Some authors don’t have a Gravatar account or the image doesn’t match your site. Using the WP User Avatar Plugin will give you more control.
Complete Author Information
Make sure all the following author information is included:
- Name and Last Name
- Display Name
- Author Bio
- Author Image
2. Recreate Layout in Theme Builder
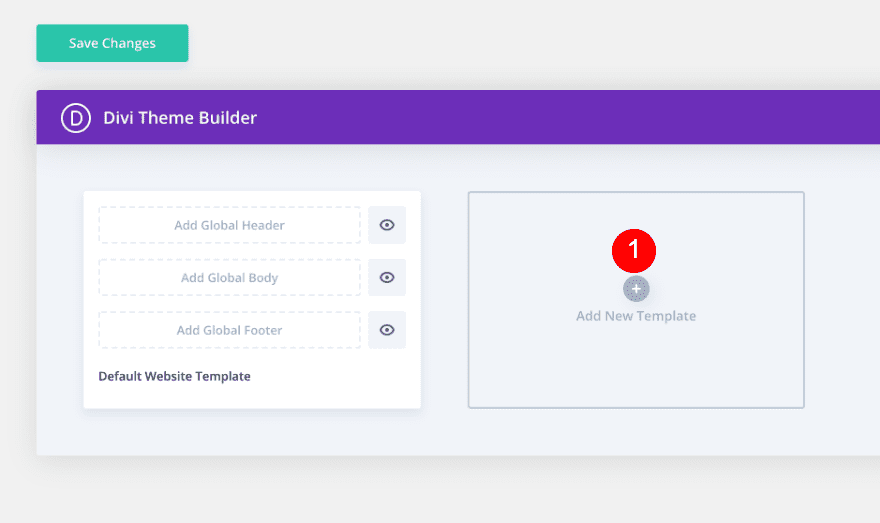
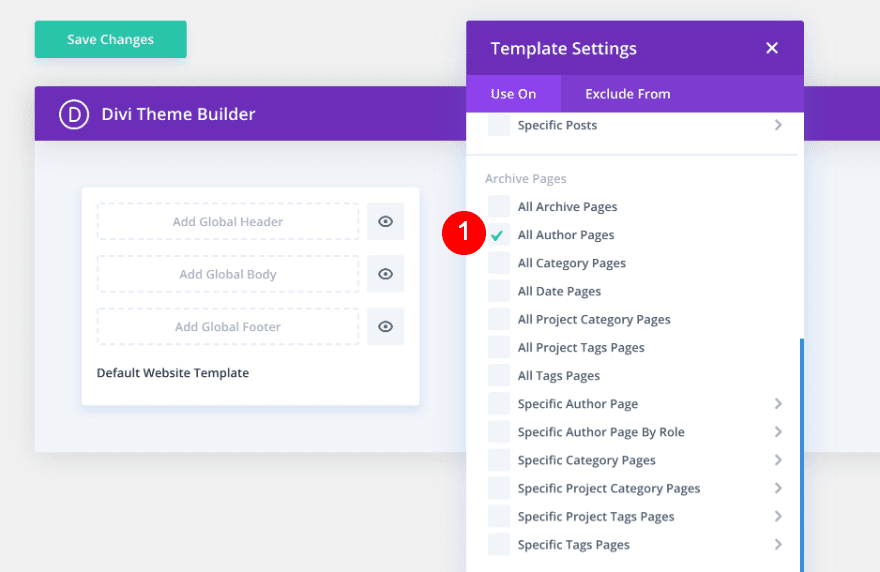
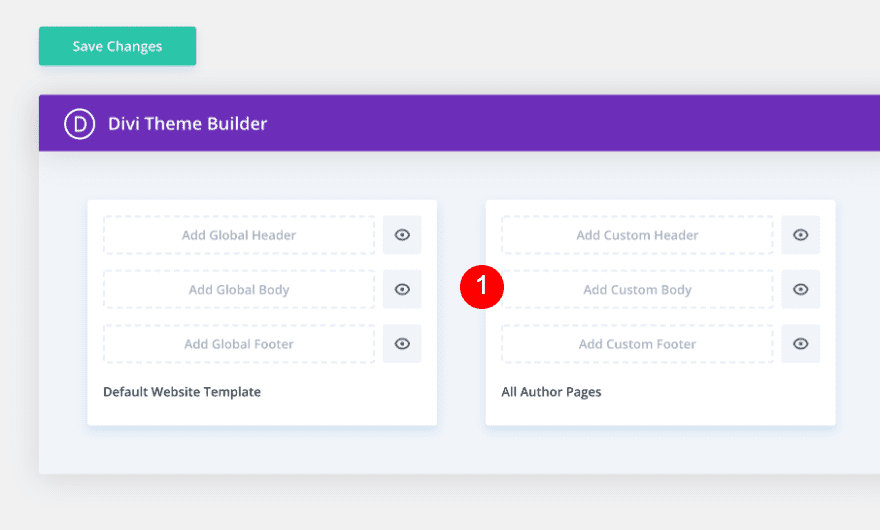
Open Theme Builder
The first step to recreate the author page template is opening the Theme Builder and adding a new template. Select “All Author Pages” under the Archive Pages section and click on the blue “Create Template” button.
Create Custom Body
Once the new template is created, click on “Add Custom Body” to enter the template editor.
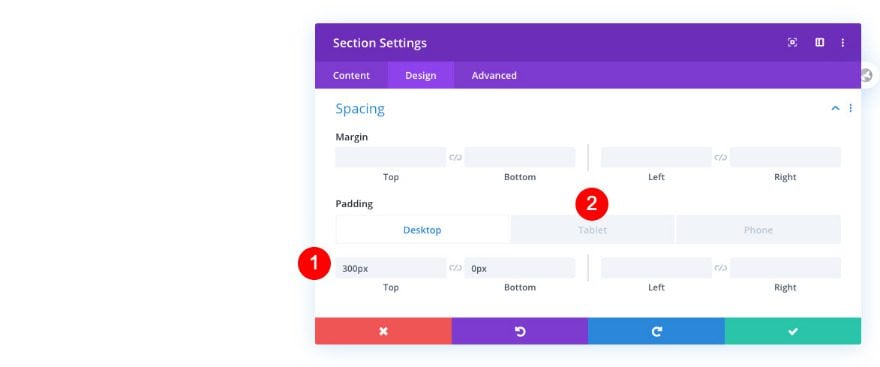
Section 1 Settings
Spacing
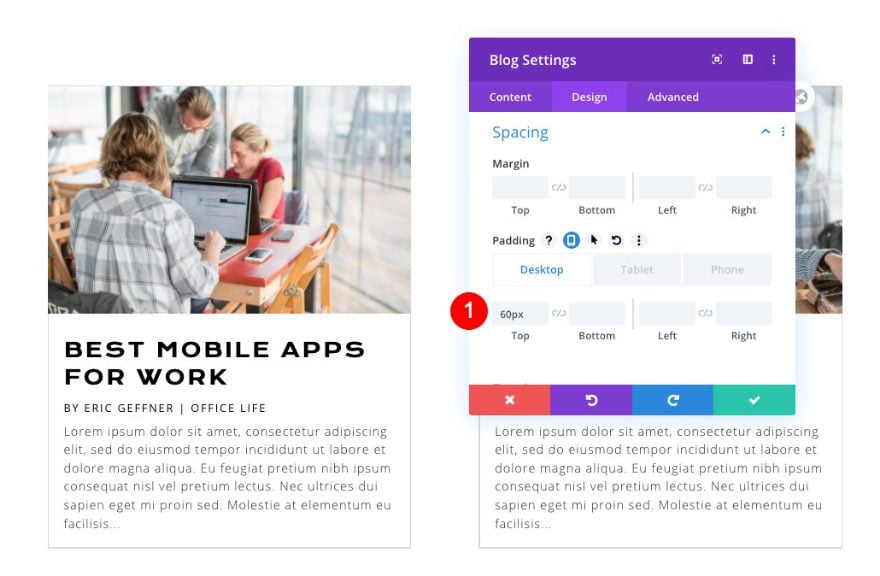
Time to build the layout! Inside the template editor, you’ll notice a section. Open the section and change the spacing values as follows:
- Top Padding
- Desktop: 300px
- Tablet and Phone: 50px
- Bottom Padding
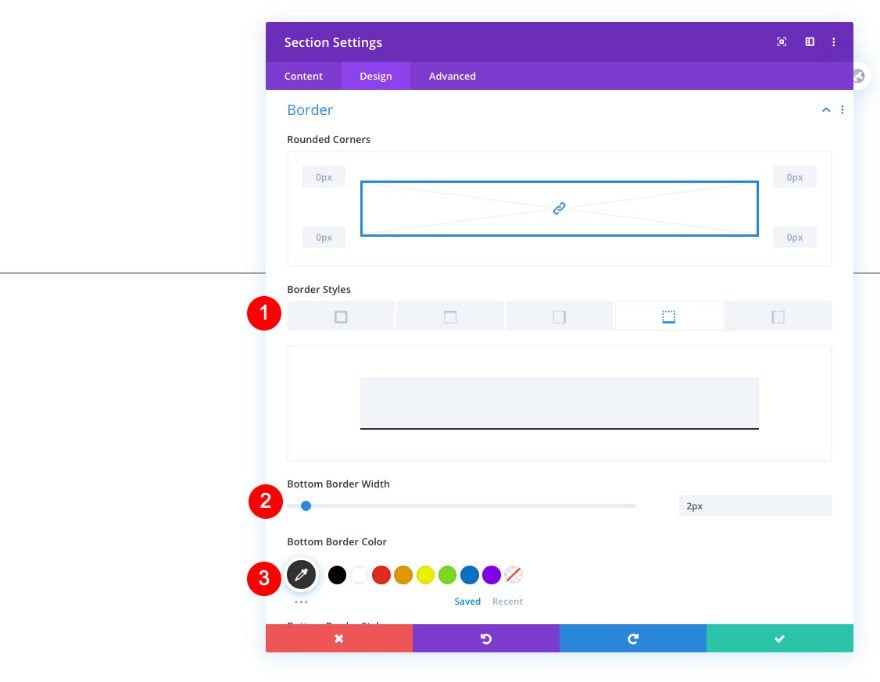
Border
Add a bottom border to the section as well.
- Border Styles: Bottom Border
- Width: 2px
- Color: Black #000000
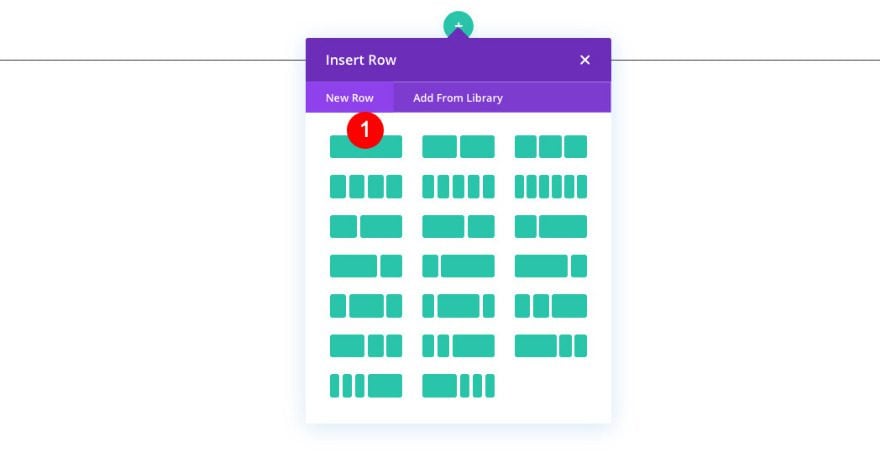
Add Row 1
Column Structure
Now, add a row with the following column structure:
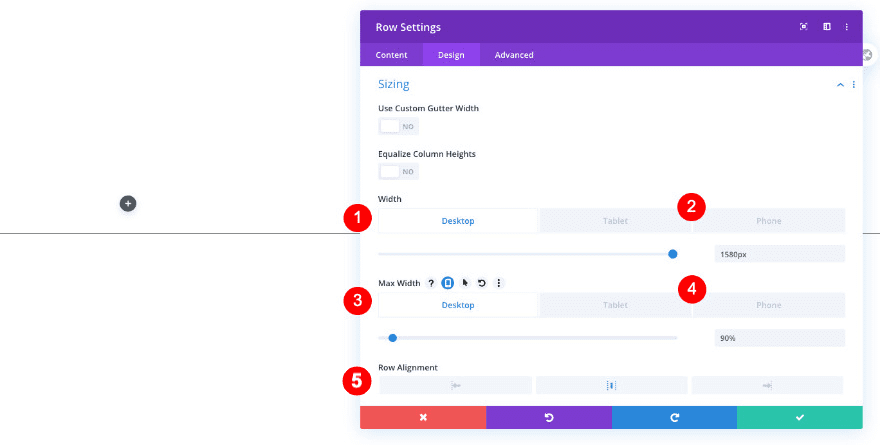
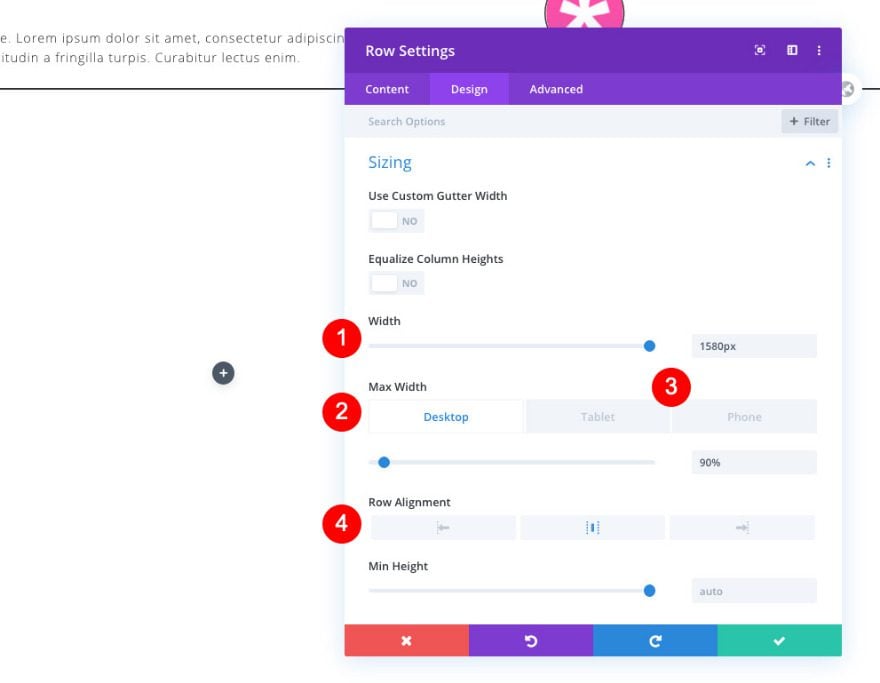
Sizing
Open the row settings and change the sizing as follows:
- Width
- Desktop: 1580px
- Tablet and Phone: auto
- Max Width
- Desktop: 90%
- Tablet and Phone: 80%
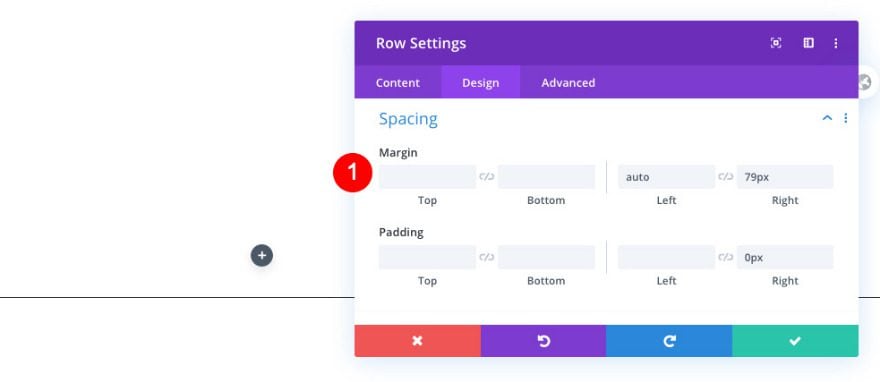
Spacing
Modify the spacing settings next.
- Left Margin: auto
- Right Margin: 79px
- Right Padding: 0px
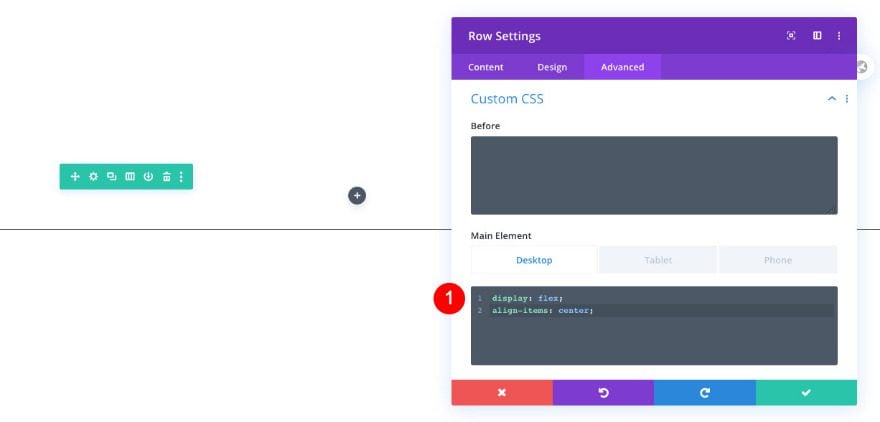
Custom CSS
Last but not least, align all column content using two lines of CSS code in the row’s main element.
- Main Element
- Desktop: display: flex; align-items: center;
display: flex;
align-items: center;
-
- Tablet and Phone: display: block;
display: block;
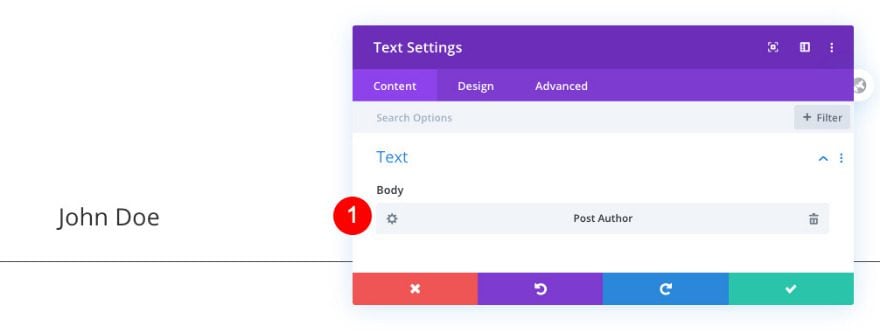
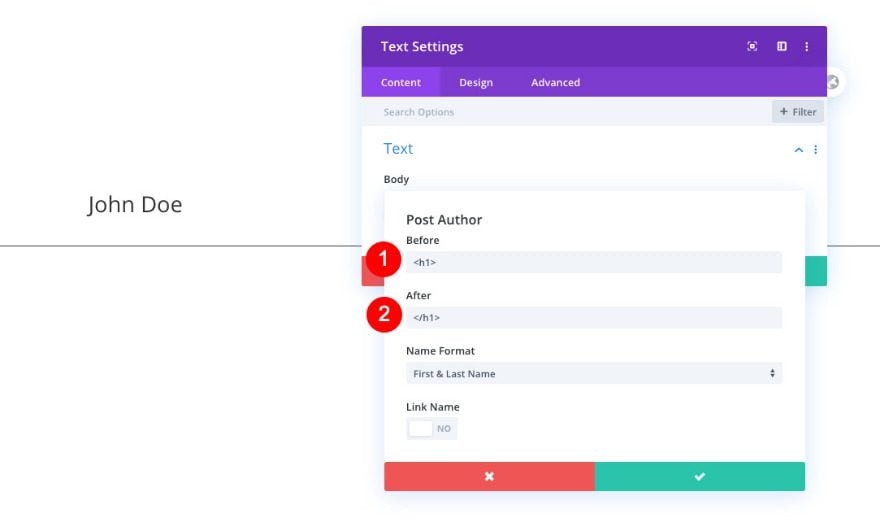
Add Text Module 1 to Column 1
Content Text
Time to add modules, starting with a text module in column 1. Link the correct dynamic content.
- Body: Dynamic Content – Post Author
- Before: <h1>
- After: <h1>
- Name Format: First & Last Name
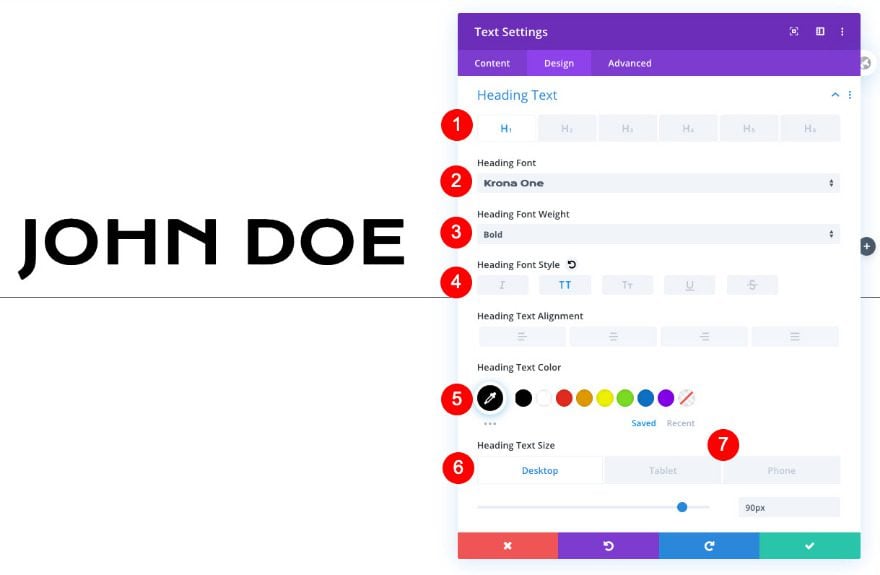
Heading Text
Then, style the heading text as follows:
- Heading Level: H1
- Font: Krona One
- Weight: Bold
- Style: TT
- Color: Black #000000
- Size
- Desktop: 90px
- Tablet: 60px
- Phone: 50px
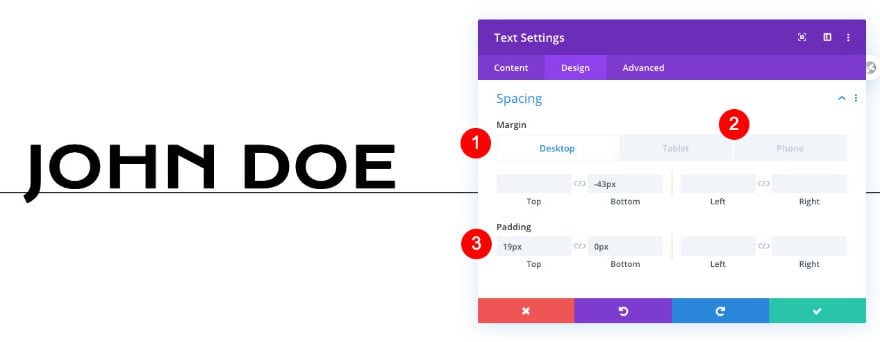
Spacing
Add some responsive spacing values too.
- Bottom Margin
- Desktop: -43px
- Tablet: -33px
- Phone: -27px
- Top Padding: 19px
- Bottom Padding: 0px
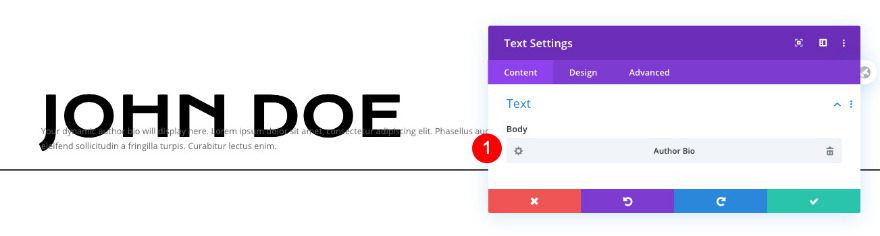
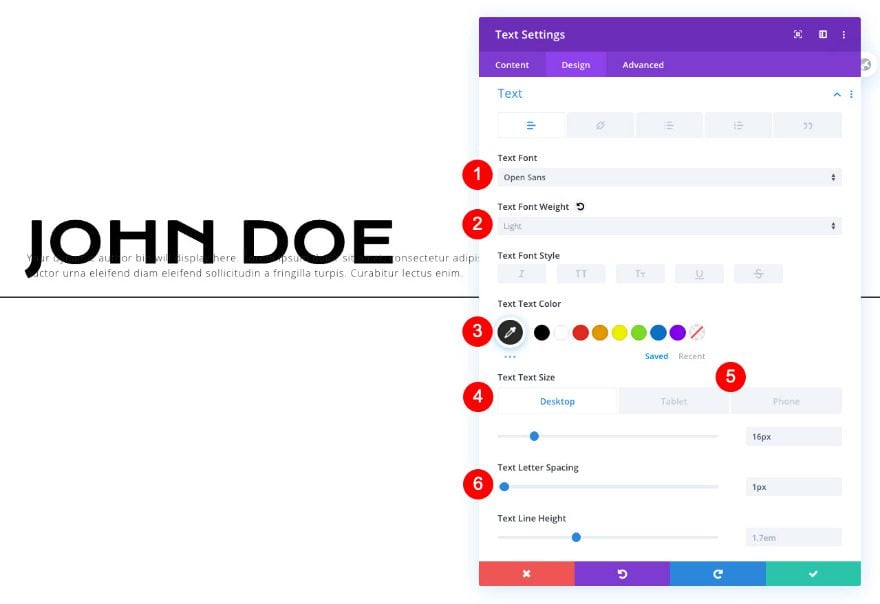
Add Text Module 2 to Column 1
Content Text
On to the next module, which is another text module. Add the author bio dynamic content.
- Body: Dynamic Content – Author Bio
Text
Then, style the text in the design tab.
- Font: Open Sans
- Weight: Light
- Color: Black#000000
- Size
- Desktop: 16px
- Tablet: 15px
- Phone: 14px
- Letter Spacing: 1px
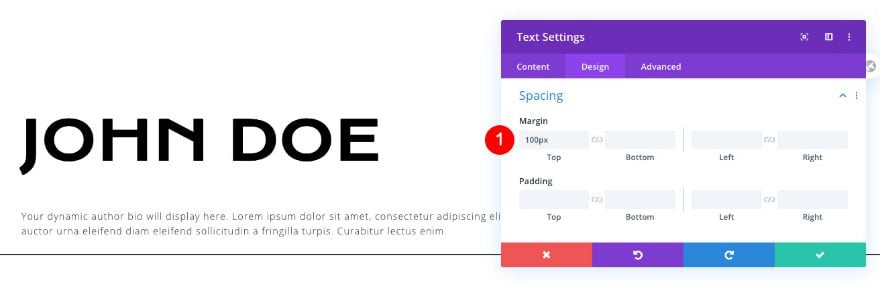
Spacing
And complete the module settings by adding some top margin.
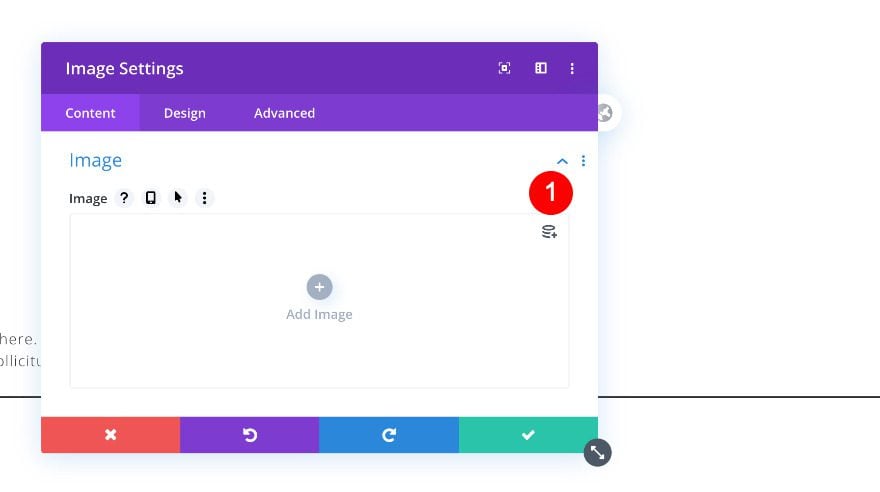
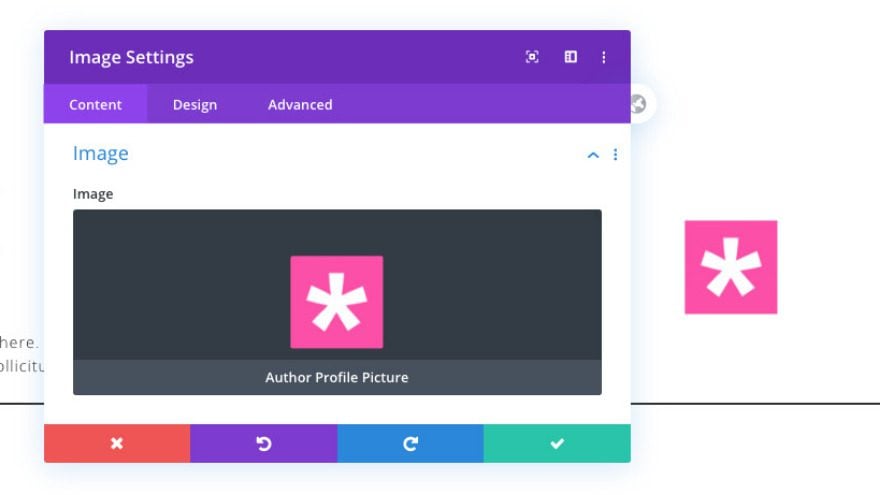
Add Image Module to Column 2
Image Content
Move on to column 2 and add an image module. Erase the default placeholder and connect the author profile picture dynamic content.
- Image: Dynamic Content – Author Profile Picture
Sizing
Then, adjust the sizing settings of the image.
- Width
- Desktop: 100%
- Tablet and Phone: 50%

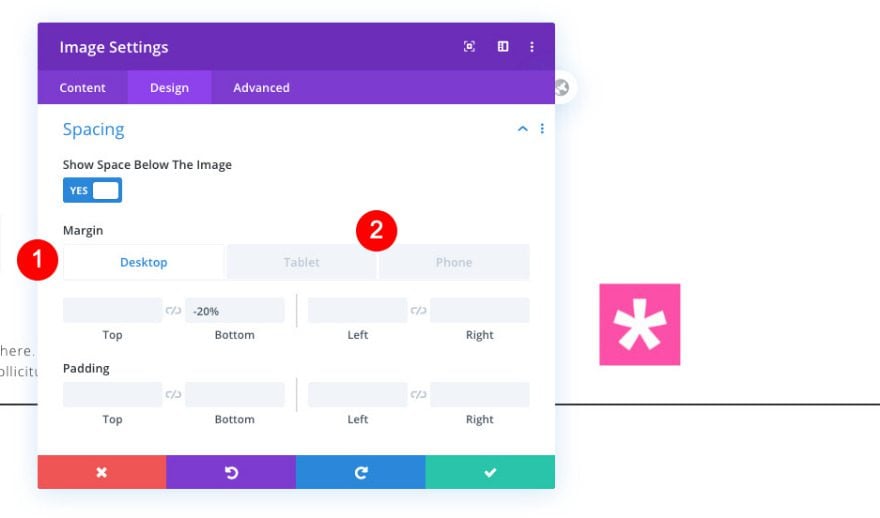
Spacing
Add some responsive bottom margin too.
- Bottom Margin
- Desktop and Tablet: -20%
- Phone: -30%
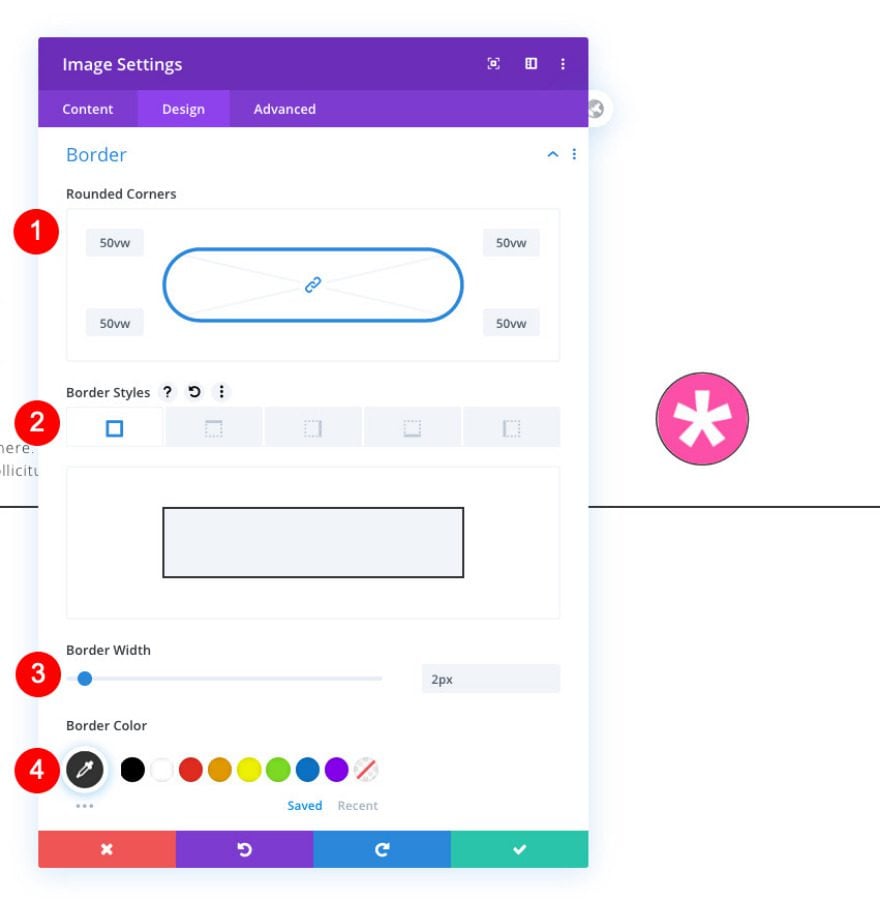
Border
Complete the module settings by adding some rounded corners to the border settings. This will help turn the module into a circle.
- Rounded Corner: 50vw all four corners
- Styles: All four sides
- Width: 2px
- Color: Black #000000
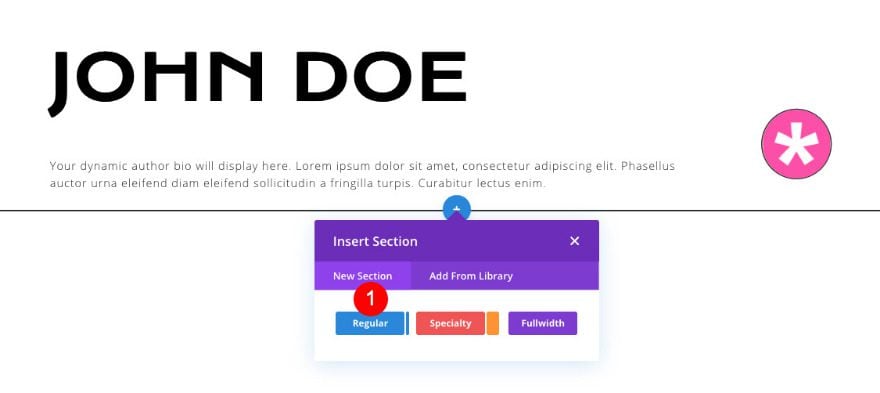
Add Section 2
Spacing
Now add another regular section, open the section settings and modify the top and bottom padding values.
- Top and Bottom Padding: 300px

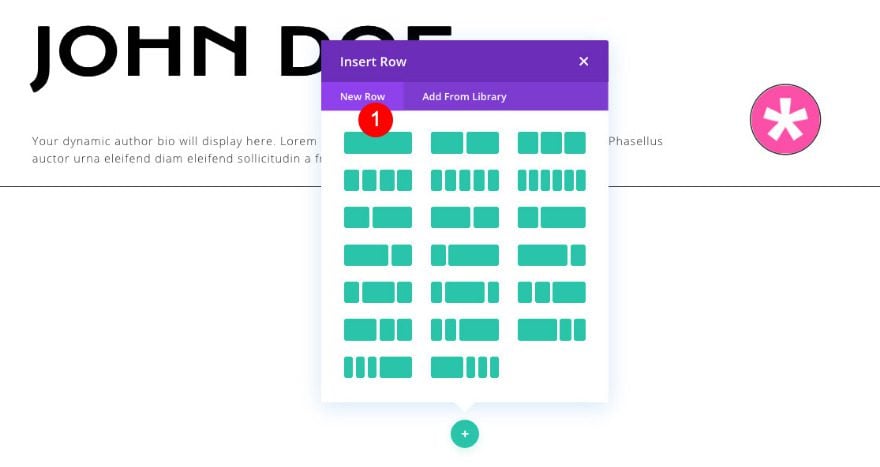
Add Row 2
Column Structure
Add a row with one column next.
Sizing
Open the row settings, go the design tab and make some changes to the sizing settings.
- Width: 1580px
- Max Width
- Desktop and Tablet: 90%
- Phone: 95%
- Row Alignment: Center
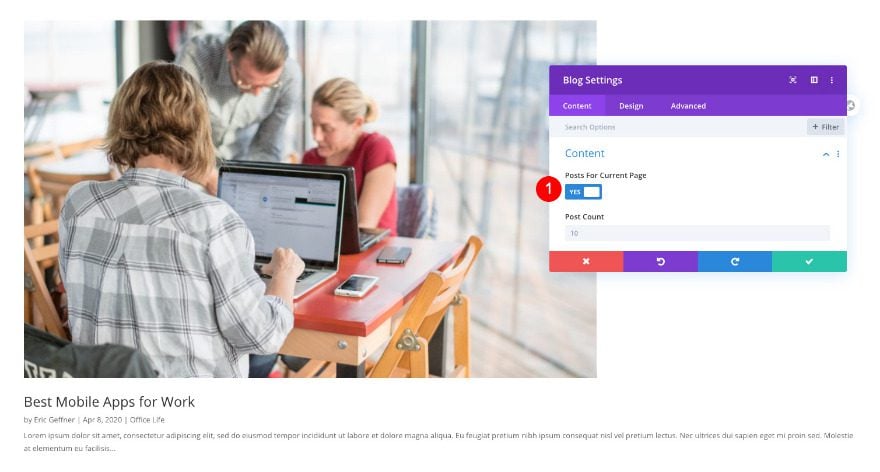
Add Blog Module
Content
The only module we need in this section/row is a Blog Module. Make sure you enable the ‘Posts For Current Page’ option. This will make sure only posts made by the author in question are shown.
- Posts For Current Page: Yes
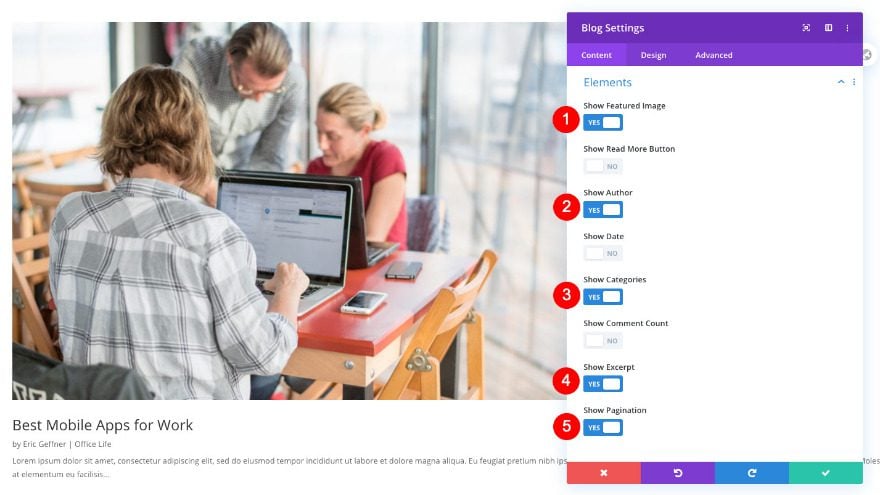
Elements
In the elements section, we’re enabling the following elements to show up in our design:
- Featured Image
- Author
- Categories
- Excerpt
- Pagination
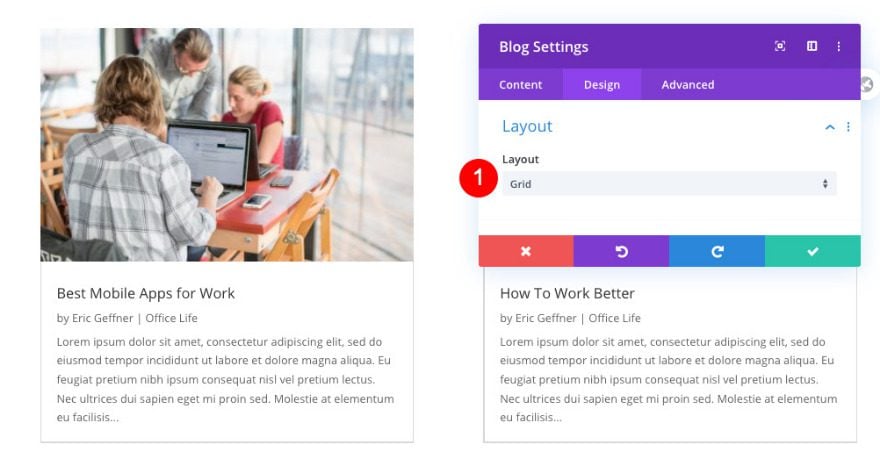
Layout
Move on to the design tab next and change the layout.
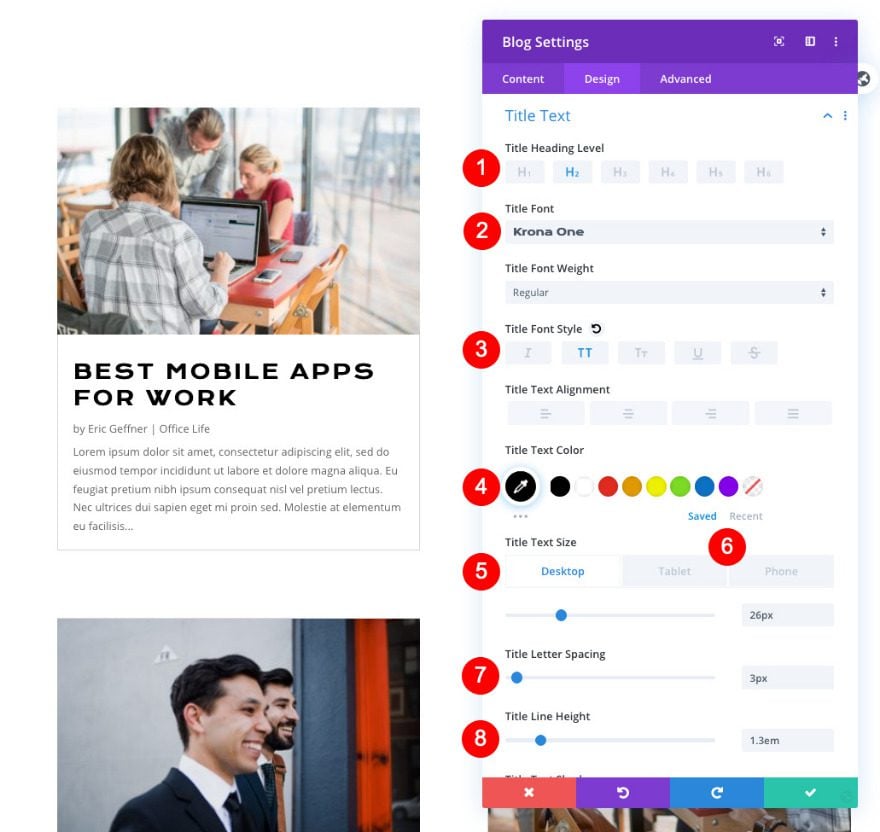
Title Text
Then, style the title text accordingly:
- Heading Level: H2
- Font: Krona One
- Style: TT
- Color: Black #000000
- Size
- Desktop: 26px
- Tablet: 16px
- Phone: 18px
- Letter Spacing: 3px
- Line Height: 1.3m
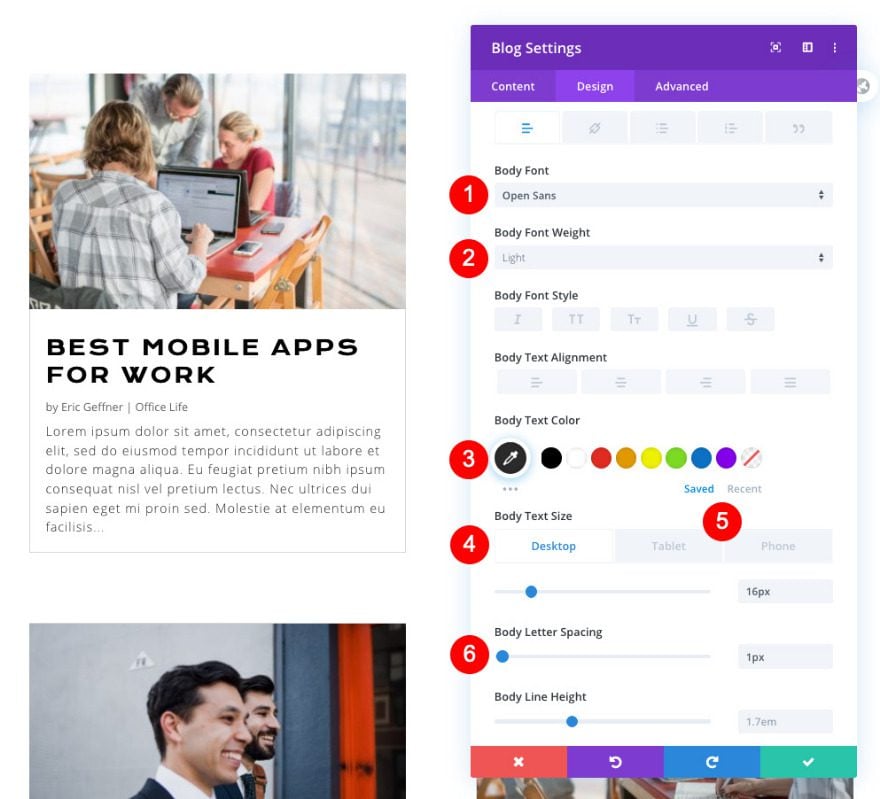
Body Text
We’re modifying the body text settings too.
- Font: Open Sans
- Weight: Light
- Color: Black #000000
- Size
- Desktop: 16px
- Tablet: 15px
- Phone: 14px
- Letter Spacing: 1px
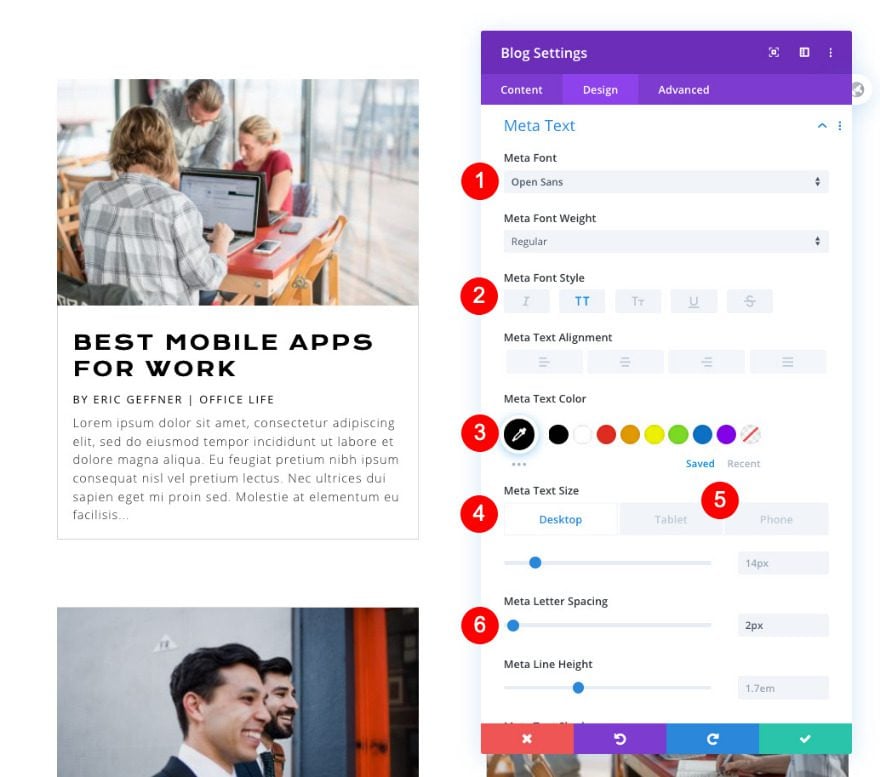
Meta Text
Then, we’ll make some changes to the meta text settings.
- Font: Open Sans
- Style: TT
- Color: Black #000000
- Letter Spacing: 2px
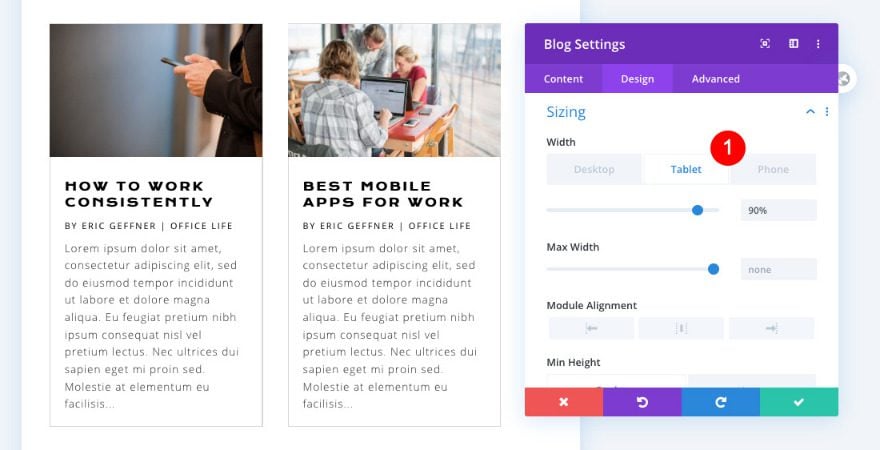
Sizing
Continue by modifying the module’s sizing settings across different screen sizes.
- Width
- Desktop: auto
- Tablet: 90%
- Phone: 80%
Spacing
Then, add some top padding.
- Top Padding
- Desktop: 60px
- Tablet & Phone: 70px
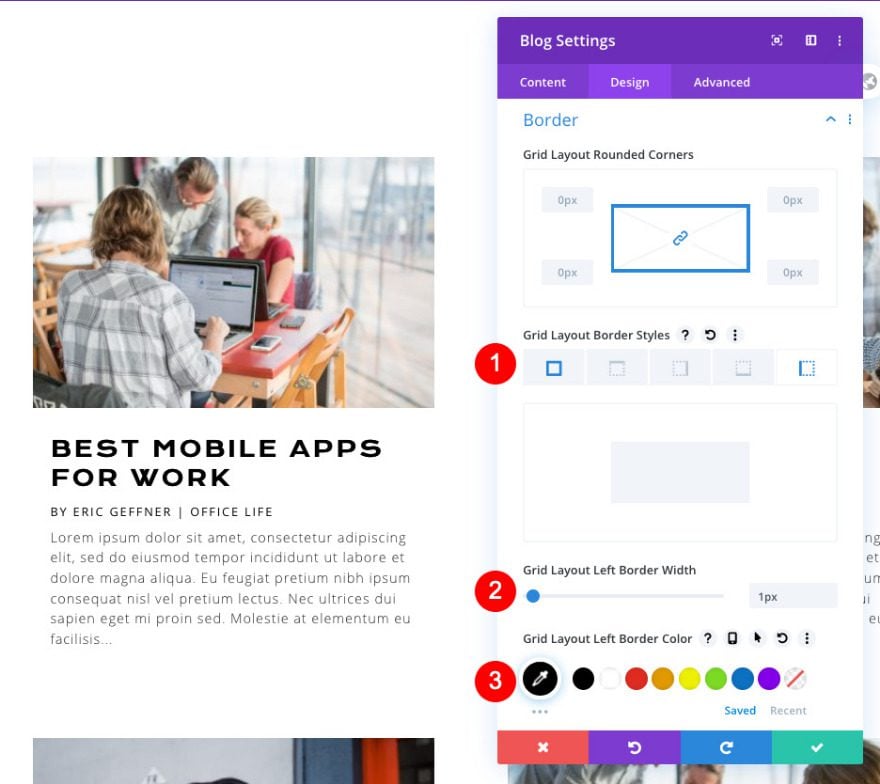
Border
We’re changing the module’s border settings too.
- Grid Layout Border Styles: Left Side
- Width: 1px
- Color: Black #oooooo
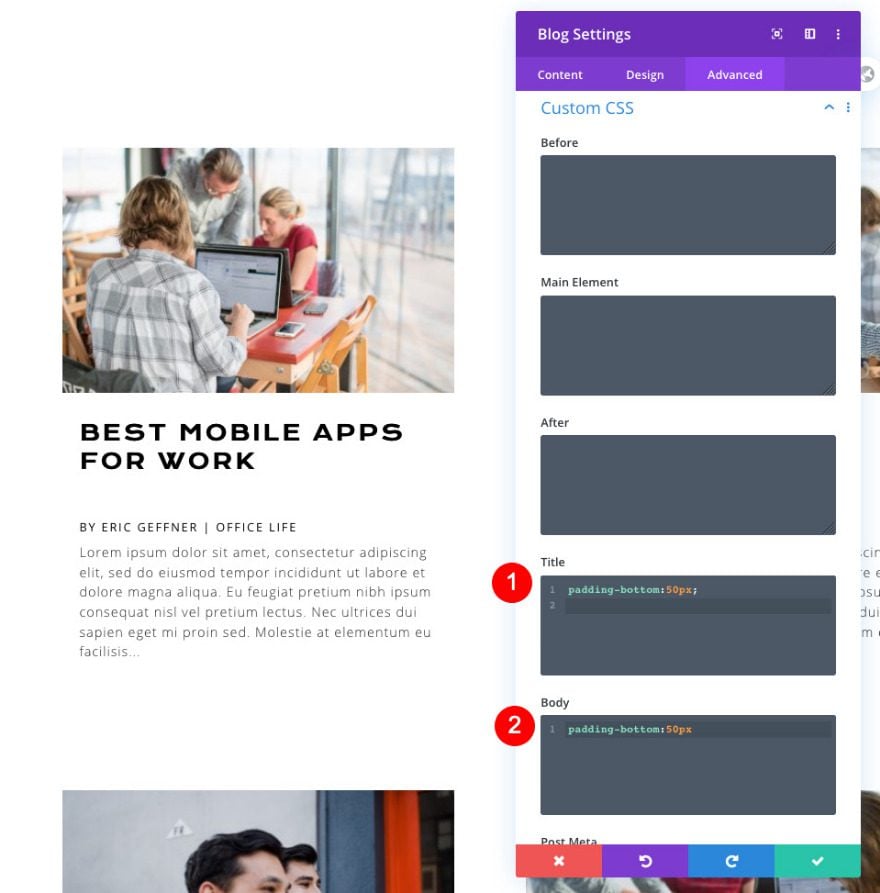
Custom CSS
And we’ll complete the design by two lines of CSS code to the module’s title and body!
- Title: padding-bottom: 50px;
padding-bottom: 50px;
- Body: padding-bottom: 50px;
padding-bottom: 50px;
Preview
Now that we’ve gone through all the steps, let’s take a final look at the outcome across different screen sizes.
Desktop
Mobile
That’s a Wrap!
In this tutorial, we’ve created a custom author page template with Divi’s Theme Builder. We’ve combined dynamic content with Divi’s built-in options to create a minimal author page design. Remember that all authors need to have a first and last name, author bio, and profile photo. If you’ve downloaded the JSON file, you can import it into your Divi Theme Builder main area. If you have any questions or suggestions, feel free to leave a comment in the comment section below!
[ad_2]
Source link